Tag: Tally Accounting Tutorial

  • How to Print Invoices in Tally with GST Details: A Complete Step-by-Step Guide for Accurate Billing

    Printing GST-compliant invoices directly from Tally Prime is one of the most essential activities for businesses of all sizes. Whether you operate a small trading firm, a service-based company, or a manufacturing unit, generating a professional tax invoice with CGST, SGST, IGST, HSN/SAC codes, and complete buyer details is mandatory under GST rules. Tally makes this entire process fast, flexible, and highly customizable.

    In this detailed guide, you will learn how to enable GST, configure invoice format, add HSN/SAC codes, set print options, and finally print GST invoices accurately in Tally Prime. The article also includes tables, figures, examples, and expert-level tips to improve invoice clarity and compliance.


    1. Understanding GST Invoices in Tally

    A GST invoice is an official document issued to customers that includes:

    • Supplier details
    • Customer details
    • Item-wise amount
    • HSN/SAC code
    • Taxable value
    • GST rate and calculation
    • Total invoice value
    • Declaration and signature

    Tally Prime automatically captures most of these elements when your GST settings and ledger details are correctly configured.

    An average GST invoice generated in Tally contains 12+ mandatory data fields and 4–7 tax calculation fields, depending on the nature of supply (interstate or intrastate).


    2. Enable GST Features in Tally

    Before printing invoices with GST details, enable taxation features.

    Step-by-step to activate GST:

    1. Open Tally Prime.
    2. Press F11 (Features).
    3. Select Statutory & Taxation.
    4. Set Enable Goods and Services Tax (GST) to Yes.
    5. Set Set/alter GST details to Yes and enter:
      • GSTIN
      • State
      • Registration type
      • Applicable from date
    6. Save settings.

    This configuration ensures Tally automatically applies CGST, SGST, or IGST based on customer location.


    3. Configure Ledger Master for GST Printing

    Correct GST printing depends on proper ledger setups. Ensure item, tax, and customer ledgers contain complete details.

    Essential ledgers required:

    Ledger TypeMandatory Fields
    Customer LedgerGSTIN, State, Registration Type
    Tax LedgersCGST %, SGST %, IGST %
    Item LedgerHSN/SAC Code, Tax Rate

    Many printing errors happen because HSN codes or GSTIN numbers are missing. Ensure these are filled correctly.


    4. Enable GST Details in Invoice Printing

    To print complete GST details, configure voucher printing settings.

    Steps:

    1. Open Gateway of Tally.
    2. Go to Configure (F12) inside Sales Voucher.
    3. Enable the following:
      • Show HSN/SAC
      • Show GST Rate
      • Show Tax Analysis
      • Show Totals and Grand Total
    4. Save the configuration.

    These settings ensure the printed invoice includes the full tax breakup, which is mandatory under GST law.


    5. Create a Sales Invoice with GST

    Let’s look at a standard example:

    Example Invoice Data:

    • Customer: A.R. Traders
    • Place of Supply: Rajasthan
    • Goods Sold: 10 Units of LED Lights
    • Rate per unit: 850
    • GST Rate: 18% (9% CGST + 9% SGST)
    • HSN Code: 940540

    Taxable calculation:

    10 units × 850 = 8,500

    GST Breakdown:

    • CGST 9% = 765
    • SGST 9% = 765

    Total invoice value = 8,500 + 1,530 = 10,030

    Tally automatically performs these calculations once item and tax ledgers are properly configured.


    6. How to Print Invoice in Tally with GST Details

    Now that you have created the invoice, here are the printing steps.

    Step-by-step printing guide:

    1. Open the created Sales Voucher.
    2. Press Alt + P (Print).
    3. Select Configured to modify print customization.
    4. Ensure below fields are enabled:
      • Print GSTIN
      • Print HSN Summary
      • Print Tax Amounts
      • Print Declaration
      • Show Company GST Details
    5. Press C to save configuration.
    6. Press P to print the invoice.

    Tally will generate a GST-compliant tax invoice with:

    • Company & party GST number
    • HSN/SAC
    • Tax rate
    • Taxable value
    • CGST/SGST/IGST
    • Final invoice total
    • Company declaration & signature space

    This layout meets GST invoicing standards followed pan-India.


    7. Customizing Printed GST Invoice Format in Tally

    Tally offers multiple customization choices.

    Popular options:

    CustomizationDescription
    Print Item-wise TaxShows tax amount for each product separately
    Print HSN SummaryShows item-wise HSN in summary format
    Notes/DeclarationAdd custom terms like warranty, delivery note, or payment terms

    Businesses printing 100+ invoices monthly generally use item-wise tax and declaration sections for clarity.


    8. Previewing GST Invoice Before Printing

    It is recommended to preview your invoice before taking a final print to avoid paper waste and errors.

    How to preview:

    1. Open invoice.
    2. Press Alt + P.
    3. Select Preview instead of Print.

    Preview helps verify:

    • Tax calculations
    • Buyer details
    • HSN codes
    • Invoice numbering
    • Total amount in words

    Many companies save the preview as a PDF using Windows Print-to-PDF for record-keeping.


    9. Useful Tips for GST Invoice Printing in Tally

    Below are practical tips to ensure accurate and faster GST billing.

    Tips:

    1. Always keep GSTIN of customers updated.
    2. Use rounding ledger to avoid decimal mismatches.
    3. Maintain unique invoice numbering for compliance.
    4. Update HSN codes yearly as per GST notifications.
    5. Print sample invoices monthly to verify layout.
    6. Use A4 printer settings for best alignment with Tally format.
    7. Enable Company Logo for professional look.

    Businesses printing up to 500 invoices per month save nearly 18–25% processing time by preparing optimized templates in Tally.


    10. Common Problems During GST Invoice Printing and Fixes

    ProblemSolution
    GST not showing on invoiceEnable GST and configure tax ledgers properly
    Wrong tax calculatedCheck tax ledger percentage and place-of-supply
    HSN code missing in printEnable HSN display in voucher print configuration
    Total in words missingEnable amount in words under printing options

    These small corrections ensure a perfect GST-compliant invoice every time.


    Conclusion

    Printing invoices with GST details in Tally Prime is extremely efficient when GST configuration, ledger setup, and print options are properly defined. Tally’s built-in tools provide everything required to comply with Indian GST laws while producing professional and accurate invoices. By following the steps outlined in this guide, any business can generate clear, error-free GST invoices within seconds and maintain reliable records for audits and monthly returns.


    Disclaimer

    This article is for educational purposes and general guidance only. GST rules and Tally features may change over time, so always verify settings with the latest statutory updates and consult a professional if needed.

  • How to Create Company and Ledger in Tally Prime: Complete Step-by-Step Guide

    Tally Prime is one of the most trusted accounting and GST compliance software used by millions of businesses. Whether you are a beginner in accounting or a professional managing multiple clients, knowing how to create a Company and Ledgers in Tally Prime is essential. Without proper company setup and ledger creation, no business transactions can be recorded accurately.

    In this detailed guide, you will learn what a company in Tally means, how to create one, how to configure its features, how to create essential ledgers, and how to organize your chart of accounts effectively. This article is written in a simple and practical manner with tables, tips, and examples for better understanding.


    What Is a Company in Tally Prime?

    A Company in Tally Prime represents the business entity whose books of accounts you want to maintain. It contains essential information such as:

    • Company Name
    • Financial Year
    • Books Beginning Date
    • Address and Contact Details
    • GST Information
    • Currency Details
    • Security Controls
    • Financial and Accounting Preferences

    Tally Prime allows unlimited companies to be created and maintained in a single system. They can be opened, shut, altered, backed up, and restored anytime.


    How to Create a Company in Tally Prime

    You can create a company in Tally Prime through the Create Company menu.

    Step-by-Step Process

    Step 1: Open Tally Prime

    Start Tally Prime from your desktop.
    Once it opens, you will see the Gateway of Tally screen.

    Step 2: Go to Create Company

    You will see the following options:

    • Create Company
    • Select Company
    • Shut Company

    Choose Create Company.

    Step 3: Enter Company Details

    Fill in the details as required.

    FieldDescription
    DirectoryWhere your company data will be stored
    NameOfficial name of your business
    Mailing NameName to print on invoices
    AddressCompany address
    CountryLocation of business
    StateState for GST applicability
    PincodePostal code
    Phone/EmailContact information
    Financial Year BeginStart of financial year, e.g., 01-04-2024
    Books Begin FromStart date of accounts
    CurrencyAuto-filled based on country

    Step 4: Enable GST and Other Features

    After entering basic details, enable additional features as needed:

    • Enable GST
    • Maintain Accounts with Inventory
    • Enable Security Control
    • Enable TDS/TCS
    • Enable Payroll

    Each business requires different modules depending on operations.

    Step 5: Save the Company

    Press Ctrl + A to save the company.
    Now your Tally company is successfully created.


    Additional Company Configurations

    Once created, you can configure additional settings through:
    Gateway of Tally > F11 (Features)

    Some commonly used configurations are:

    FeaturePurpose
    Accounting FeaturesEnable credit limits, bill-wise details, cost centers
    Inventory FeaturesEnable batches, expiry dates, godowns
    Statutory FeaturesEnable GST, TDS, TCS, PF, ESI
    Invoice FeaturesEnable item-wise tax, discount, e-way bill options

    These settings help customize Tally Prime based on your business needs.


    What Is a Ledger in Tally Prime?

    A Ledger is an accounting head under which financial transactions are recorded.
    Tally uses a group and ledger system based on the accounting hierarchy.

    Examples of commonly used ledgers:

    • Cash
    • Bank Accounts
    • Sundry Debtors
    • Sundry Creditors
    • Purchase
    • Sales
    • Duties & Taxes
    • Capital Account
    • Fixed Assets
    • Expenses (Direct & Indirect)

    A company must have at least two ledgers to start:

    • Cash
    • Profit & Loss A/c (Created automatically)

    All other ledgers must be created manually.


    How to Create a Ledger in Tally Prime

    Step-by-Step Process for Creating a Ledger

    Step 1: Go to Ledger Creation Screen

    Gateway of Tally > Create > Ledger
    OR
    Press Alt + C while entering a voucher.

    Step 2: Enter Ledger Details

    Fill in the required details.

    FieldDescription
    NameLedger name (e.g., ABC Traders)
    GroupCorrect group classification such as Sundry Debtors
    Opening BalanceOpening value if any
    GST DetailsFor GST registered ledgers
    Mailing DetailsFor customers and suppliers

    Step 3: Group Selection

    Selecting the right group is very important because it affects:

    • Financial statements
    • Trial balance
    • Profit and loss
    • Balance sheet classification

    Example:
    Sale ledger should be under Sales Accounts,
    Supplier ledger under Sundry Creditors,
    Customer ledger under Sundry Debtors,
    Expenses under Indirect Expenses.

    Step 4: Save Ledger

    Press Ctrl + A to save.


    Types of Ledgers You Should Create in Every New Company

    Below is a practical list of common ledgers used in most businesses:

    1. Capital and Owner-Related Ledgers

    • Capital Account
    • Drawings

    2. Banking Ledgers

    • Bank Account Name
    • Bank OD/CC Accounts

    3. Sales and Purchase Ledgers

    • Sales GST 5 percent
    • Sales GST 12 percent
    • Sales GST 18 percent
    • Purchase GST 5 percent
    • Purchase GST 12 percent
    • Purchase GST 18 percent

    4. Tax Ledgers

    • CGST
    • SGST
    • IGST
    • TDS Payable
    • TCS Payable

    5. Customer and Supplier Ledgers

    Each customer and supplier has its individual ledger.

    6. Expense Ledgers

    • Rent
    • Salary
    • Office Expenses
    • Electricity Expenses
    • Telephone Charges
    • Stationery

    7. Asset and Liability Ledgers

    • Furniture
    • Computers
    • Building
    • Loan Accounts
    • Outstanding Expenses

    Example Table: Ledger and Its Group

    Ledger NameGroup
    ABC TradersSundry Debtors
    Rent ExpenseIndirect Expenses
    CGST PayableDuties & Taxes
    SBI Bank A/cBank Accounts

    Important Tips for Creating Accurate Ledgers in Tally Prime

    Here are must-follow guidelines to avoid errors:

    1. Use Proper Naming Conventions

    Examples:

    • Don’t use abbreviations without clarity.
    • Use customer/supplier names exactly as per invoices.

    2. Select Correct Group Always

    Grouping mistakes can cause wrong balance sheet or P&L results.

    3. Maintain Opening Balances Carefully

    Incorrect opening balances can reflect wrong totals throughout the year.

    4. Enable Bill-Wise Details

    Useful for tracking customer invoices, outstanding payments, and supplier credits.

    5. Add GST Details for Taxable Ledgers

    For customers and suppliers:

    • GSTIN
    • Registration type
    • State
    • Tax applicability

    For product-based ledgers:

    • GST rate
    • HSN/SAC code

    6. Use Mailing Details for Parties

    This helps generate invoices, statements, and reports accurately.

    7. Regularly Review the Chart of Accounts

    Tally Prime allows viewing all ledgers through:
    Gateway of Tally > Chart of Accounts

    This helps identify:

    • Duplicate ledgers
    • Wrong groups
    • Incomplete details

    Example: Creating a Customer Ledger

    To create a ledger for a customer named Sharma Traders:

    • Name: Sharma Traders
    • Group: Sundry Debtors
    • Maintain balances: Yes
    • Enable bill-wise details: Yes
    • Opening balance: Enter outstanding receivable
    • GSTIN: If available
    • State: Required for intra-state or inter-state supply

    This ensures proper tracking of sales, receipts, and outstanding balances.


    Example: Creating a Sales Ledger with GST

    For GST-based sales at 18 percent:

    • Name: Sales 18 Percent
    • Group: Sales Accounts
    • Type of supply: Goods or Services
    • GST Rate: 18 percent
    • HSN/SAC: Enter if known

    This ledger will automatically calculate GST in invoices.


    Conclusion

    Creating a Company and Ledger in Tally Prime is the foundation of maintaining accurate and compliant accounts. With proper setup, correct grouping, and well-structured ledgers, your accounting process becomes smooth and error-free. This guide explained company creation, ledger creation, essential fields, GST setups, grouping, and best practices in a simple and comprehensive format. Whether you are running a small business or managing large-scale operations, mastering these basics will significantly improve your accounting efficiency.


    Disclaimer

    This article is intended for educational purposes. Tally Prime features may vary depending on updates and configurations. Users should apply settings based on their business requirements.


  • Applying VAT on Fixed Assets in Tally.ERP 9 – Step-by-Step Tutorial with Examples

    In Tally.ERP 9, applying VAT (Value Added Tax) on fixed assets involves a few steps. Here’s a comprehensive guide on how to apply VAT on fixed assets in Tally.ERP 9:

    Step 1: Creating Fixed Assets Ledger:

    1. Go to Gateway of Tally > Accounts Info > Ledger > Create.
    2. Create a ledger named “Fixed Assets” under the group “Fixed Assets”.

    Step 2: Enabling VAT in Tally.ERP 9:

    1. Go to Gateway of Tally > F11: Features > F3: Statutory & Taxation.
    2. Enable VAT by selecting “Yes” in the option “Enable Value Added Tax (VAT)?”

    Step 3: Creating VAT Ledger:

    1. Go to Gateway of Tally > Accounts Info > Ledger > Create.
    2. Create a ledger named “VAT @ X%” (replace X with your applicable VAT rate) under the group “Duties & Taxes”.

    Step 4: Recording Purchase of Fixed Asset with VAT:

    1. Go to Gateway of Tally > Accounting Vouchers > F9: Purchase.
    2. Enter the date of purchase, supplier invoice number, and other details.
    3. Debit the “Fixed Assets” ledger with the total amount (excluding VAT).
    4. Debit the “VAT @ X%” ledger with the VAT amount.
    5. Credit the supplier’s ledger with the total amount (including VAT).

    Step 5: Calculating Input VAT Credit:

    1. Go to Gateway of Tally > Display > Statutory Reports > VAT > VAT Computation.
    2. Check the Input VAT credit available against the VAT ledger.

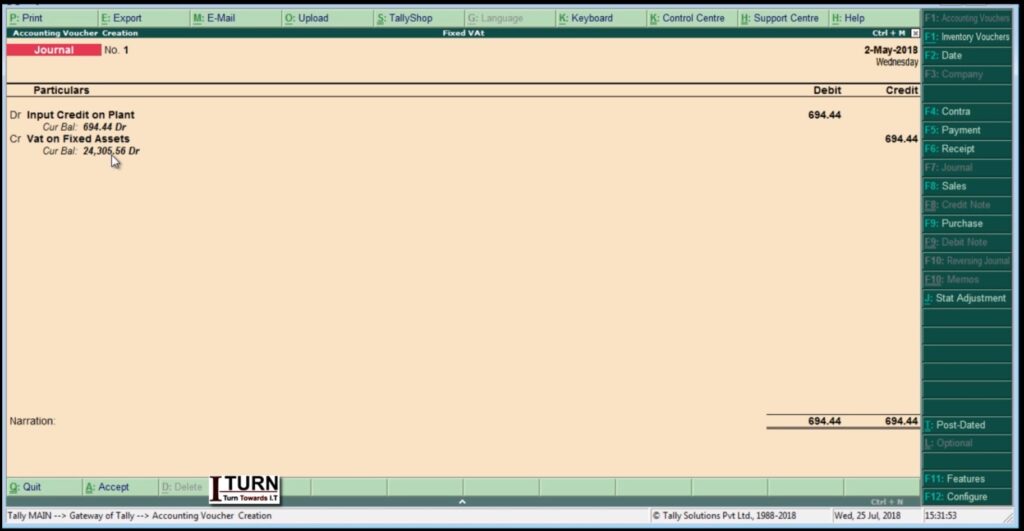
    Step 6: Adjusting Input VAT Credit:

    1. Go to Gateway of Tally > Accounting Vouchers > F7: Journal.
    2. Debit the Input VAT ledger and credit the VAT Payable ledger to adjust the input VAT credit against the VAT liability.

    Step 7: Calculating Depreciation:

    1. Go to Gateway of Tally > Accounts Info > Ledger > Create.
    2. Create a ledger named “Depreciation” under the group “Indirect Expenses”.
    3. Record depreciation entries as per the applicable rates and methods.

    Step 8: Recording Sale of Fixed Asset:

    1. Go to Gateway of Tally > Accounting Vouchers > F8: Sales.
    2. Enter the date of sale, buyer details, and other necessary information.
    3. Debit the buyer’s ledger with the sales amount (excluding VAT).
    4. Credit the “Fixed Assets” ledger with the original purchase cost.
    5. Credit the “VAT @ X%” ledger with the VAT amount charged on the sale.

    Step 9: Paying VAT Liability:

    1. Go to Gateway of Tally > Display > Statutory Reports > VAT > VAT Challan Reconciliation.
    2. Check the VAT payable amount.
    3. Go to Gateway of Tally > Accounting Vouchers > F5: Payment.
    4. Debit the VAT Payable ledger and credit the bank ledger for paying the VAT liability.

    Step 10: Updating VAT Returns:

    1. Go to Gateway of Tally > Display > Statutory Reports > VAT > VAT Returns.
    2. Generate VAT returns and file them as per legal requirements.

    Throughout these steps, ensure compliance with VAT regulations and consult with a tax advisor if needed.


    Professional Courses