Tag: Business Accounting

  • Step-by-Step Guide to Multi-Currency in TallyPrime (Export, Import & Forex Gain/Loss)

    🌍 Multi-Currency Transactions in TallyPrime

    🔹 Step 1: Enable Multi-Currency Feature

    1. Open TallyPrime → Press F11 (Features) → Accounting Features.
    2. Under General, set “Enable Multiple Currencies” → Yes.
    3. Save settings.

    🔹 Step 2: Create Currencies

    1. Go to Create → Accounts Info → Currencies → Create.
    2. Example:
      • Currency Name: US Dollar
      • Formal Name: USD
      • Symbol: $
      • Is symbol suffixed to amount: Yes
      • Number of decimal places: 2
      • Show amounts in millions: No
      • Specify Rate of Exchange: 1 USD = ₹84 (as on today’s rate)

    Repeat for other currencies (Euro, Pound, etc.).


    🔹 Step 3: Create Ledger Accounts

    • Bank Ledger (USD A/c) → Bank A/c under Bank Accounts, select currency as USD.
    • Customer Ledger (ABC Inc., USA) → Sundry Debtor, set Currency: USD.
    • Sales Ledger → Invoicing → Use default Base Currency (INR).

    🔹 Step 4: Record Multi-Currency Sales Voucher (Example 1: Export Sales)

    Scenario:

    👉 You sold goods worth $1,000 to ABC Inc. (USA).
    👉 Exchange Rate: 1 USD = ₹84

    Steps:

    1. Go to Sales Voucher (F8).
    2. Select Customer: ABC Inc. (Currency USD).
    3. Enter item details, amount will show in USD.
      • Example: 1,000 USD.
    4. Tally automatically converts → ₹84,000 (in INR books).

    📌 Entry shown in Tally

    • Dr. ABC Inc. (USD) → $1,000 (₹84,000)
    • Cr. Sales A/c → ₹84,000

    🔹 Step 5: Record Receipt Voucher (Example 2: Payment Received in USD)

    Scenario:

    👉 Customer pays $1,000 later, but now exchange rate = ₹85.

    1. Go to Receipt Voucher (F6).
    2. Dr. Bank A/c (USD) $1,000 (₹85,000).
    3. Cr. ABC Inc. (USD) $1,000 (₹84,000).

    📌 Tally automatically shows Forex Gain: ₹1,000 (difference due to exchange rate).


    🔹 Step 6: Import Purchase Example (Vendor in USD)

    Scenario:

    👉 You import raw materials worth $500, exchange rate ₹83.
    👉 Bank pays later at ₹84.

    1. Purchase Voucher (F9) → Select Supplier (USD Ledger).
    2. Purchase recorded as $500 = ₹41,500.
    3. At payment time (Payment Voucher F5):
      • Dr. Supplier $500 = ₹42,000
      • Cr. Bank A/c = ₹42,000
      • Forex Loss = ₹500

    🔹 Step 7: Reports & Analysis

    • Check Ledger → Customer/Supplier → Display → Tally shows both foreign currency & INR equivalent.
    • Balance Sheet / P&L → Consolidated in base currency (INR).
    • Forex gains/losses shown separately.

    ✅ Practical Example Summary

    TransactionCurrencyRateLedger Impact (INR)Forex Effect
    Sales to US Client$1,00084₹84,000–
    Receipt from Client$1,00085₹85,000Gain ₹1,000
    Import Purchase$50083₹41,500–
    Payment to Supplier$50084₹42,000Loss ₹500

    👉 This way, TallyPrime auto-tracks exchange rate fluctuations and shows real forex gain/loss in your accounts.


  • Comprehensive Guide to Sales Order Management in Tally ERP 9

    Let’s walk through the stages and voucher entries in the sales order process in Tally ERP 9:

    1. Sales Order:

    Definition: A sales order is a document issued by a seller to a buyer, confirming the details of the products or services the buyer intends to purchase.

    Steps to Create a Sales Order in Tally ERP 9:

    1. Navigate to Gateway of Tally > Inventory Vouchers > F5: Sales Order.
    2. Enter the sales order number, date, and other relevant details.
    3. Select the customer from the list.
    4. Enter details of the items to be sold including quantity, rate, and any applicable taxes.
    5. Save the sales order.

    Example: ABC Company receives a sales order from Customer XYZ for 50 units of Product A at a rate of $20 per unit. They create a sales order with these details.

    2. Delivery Note:

    Definition: A delivery note is prepared by the seller to confirm the delivery of goods to the buyer. It serves as an acknowledgment of the transfer of goods.

    Steps to Create a Delivery Note in Tally ERP 9:

    1. Go to Gateway of Tally > Inventory Vouchers > F8: Delivery Note.
    2. Select the sales order against which goods are to be delivered.
    3. Enter the delivery note number, date, and other relevant details.
    4. Specify the quantity and condition of goods being delivered.
    5. Save the delivery note.

    Example: ABC Company prepares a delivery note to confirm the delivery of 50 units of Product A to Customer XYZ as per the sales order.

    3. Rejection In:

    Definition: If the goods delivered are not as per the buyer’s specifications or are damaged, a rejection in voucher is prepared to return the goods to the seller.

    Steps to Create a Rejection In Voucher in Tally ERP 9:

    1. Navigate to Gateway of Tally > Inventory Vouchers > F7: Rejection In.
    2. Select the delivery note against which goods are to be rejected.
    3. Specify the quantity and condition of goods being returned.
    4. Save the rejection in voucher.

    Example: Customer XYZ rejects 5 units of Product A delivered by ABC Company due to damage. They create a rejection in voucher to return these 5 units.

    4. Sales Bill:

    Definition: A sales bill is issued by the seller to the buyer, requesting payment for the goods or services supplied.

    Steps to Create a Sales Bill in Tally ERP 9:

    1. Go to Gateway of Tally > Accounting Vouchers > F8: Sales.
    2. Select the customer from the list.
    3. Enter the sales bill number, date, and other relevant details.
    4. Specify the details of the items sold including quantity, rate, and taxes.
    5. Save the sales bill.

    Example: ABC Company sends a sales bill to Customer XYZ for the 45 units of Product A that were accepted.

    5. Credit Note:

    Definition: If there are discrepancies in the sales bill, such as over-delivery or damaged goods, the seller may issue a credit note to the buyer for adjustments in the amount owed.

    Steps to Create a Credit Note in Tally ERP 9:

    1. Navigate to Gateway of Tally > Accounting Vouchers > F7: Journal.
    2. Select Credit Note as the voucher type.
    3. Enter the credit note number, date, and other relevant details.
    4. Specify the reason for issuing the credit note and the amount to be adjusted.
    5. Save the credit note.

    Example: If ABC Company over-delivered 5 units of Product A, they issue a credit note to Customer XYZ to adjust the sales bill accordingly.

    These are the stages and voucher entries involved in the sales order process in Tally ERP 9. Each step ensures proper documentation and tracking of transactions between the seller and the buyer.

    Reports

    After completing the stages and voucher entries for sales orders in Tally ERP 9, you can view various reports related to sales transactions and inventory management. Here’s where you can find relevant reports:

    1. Sales Register:

    • Location: Gateway of Tally > Display > Account Books > Sales Register.
    • Description: The Sales Register provides a comprehensive view of all sales transactions, including sales bills and credit notes, within a specified period.

    2. Sales Summary:

    • Location: Gateway of Tally > Display > Account Books > Sales Summary.
    • Description: The Sales Summary report gives an overview of sales transactions summarized by customer, product, or sales group.

    3. Outstanding Receivables:

    • Location: Gateway of Tally > Display > Statements of Accounts > Outstandings > Receivables.
    • Description: The Outstanding Receivables report helps track pending payments from customers based on sales invoices and credit notes issued.

    4. Stock Summary:

    • Location: Gateway of Tally > Display > Inventory Books > Stock Summary.
    • Description: The Stock Summary report provides an overview of all stock items, including opening balance, inward and outward movements, and closing balance.

    5. Delivery Note Register:

    • Location: Gateway of Tally > Display > Inventory Books > Delivery Note Register.
    • Description: The Delivery Note Register displays details of all delivery notes issued, including quantities delivered and pending deliveries.

    6. Rejection In Register:

    • Location: Gateway of Tally > Display > Inventory Books > Rejection In Register.
    • Description: The Rejection In Register shows details of all goods returned by customers, helping to track rejected items and reasons for rejection.

    7. Credit Note Register:

    • Location: Gateway of Tally > Display > Accounts Books > Credit Note Register.
    • Description: The Credit Note Register provides a summary of all credit notes issued to customers, including reasons for issuing the credit notes.

    8. Inventory Ageing Analysis:

    • Location: Gateway of Tally > Display > Inventory Books > Inventory Ageing Analysis.
    • Description: The Inventory Ageing Analysis report helps identify slow-moving or obsolete inventory items based on their age.

    These reports in Tally ERP 9 enable you to monitor sales transactions, track inventory movements, analyze receivables, and manage customer accounts effectively. They provide valuable insights into your business operations and help in making informed decisions for business growth and optimization.

  • Mastering Inventory Management in Tally ERP 9

    Managing inventory information in Tally ERP 9 involves creating and organizing stock groups, stock categories, stock items, units of measurement, godowns, batch numbers, and recording stock transactions. Here are detailed steps along with five practical examples:

    Steps for Managing Inventory Information:

    Step 1: Creating Stock Groups
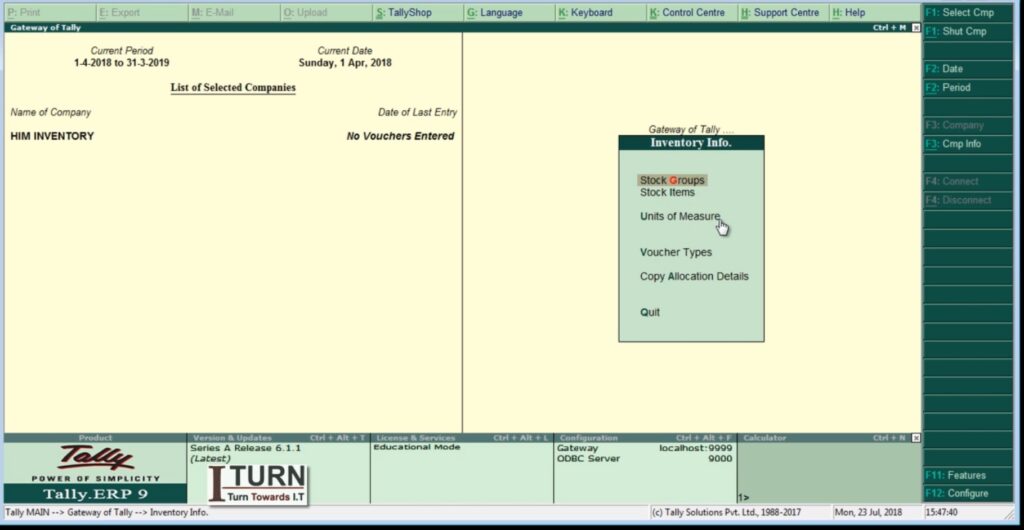
    1. Go to Gateway of Tally > Inventory Info > Stock Groups.
    2. Select “Create” (Alt + C) to create a new stock group.
    3. Enter the Name of the stock group (e.g., Electronics) and Subgroup if needed.
    4. Save the details (Ctrl + A).
    Step 2: Creating Stock Categories
    1. Go to Gateway of Tally > Inventory Info > Stock Categories.
    2. Select “Create” (Alt + C) to create a new stock category.
    3. Enter the Name of the stock category (e.g., Mobile Phones) and select the parent stock group (Electronics).
    4. Save the details (Ctrl + A).
    Step 3: Creating Stock Items
    1. Go to Gateway of Tally > Inventory Info > Stock Items.
    2. Select “Create” (Alt + C) to create a new stock item.
    3. Enter the Name of the stock item (e.g., iPhone 12 Pro) and select the parent stock category (Mobile Phones).
    4. Specify details like Units of Measurement, Standard Rate, etc.
    5. Save the details (Ctrl + A).
    Step 4: Creating Units of Measurement (UOM)
    1. Go to Gateway of Tally > Inventory Info > Units of Measurement.
    2. Select “Create” (Alt + C) to create a new unit of measurement (e.g., Dozen).
    3. Enter the Symbol and Full Form for the unit (Dozen).
    4. Save the details (Ctrl + A).
    Step 5: Creating Godowns
    1. Go to Gateway of Tally > Inventory Info > Godowns.
    2. Select “Create” (Alt + C) to create a new godown (e.g., Main Warehouse).
    3. Enter the Name and Address of the godown.
    4. Save the details (Ctrl + A).
    Step 6: Enabling Batch Numbers
    1. Go to Gateway of Tally > F11: Features > F2: Inventory Features.
    2. Enable the option “Maintain Batch-wise Details.”
    3. Save the settings (Ctrl + A).

    Practical Examples:

    Example 1: Stock Transfer Between Godowns
    1. Go to Gateway of Tally > Inventory Vouchers > F7: Stock Journal.
    2. Select the source and destination godowns.
    3. Enter the stock item details and quantity.
    4. Save the voucher (Ctrl + A).
    Example 2: Stock Receipt (Purchase) with Batch Number
    1. Go to Gateway of Tally > Inventory Vouchers > F9: Purchase.
    2. Select the supplier, stock item, and enter quantity and rate.
    3. Enable batch details, enter batch numbers, and save the voucher (Ctrl + A).
    Example 3: Stock Issuance (Sales) with Batch Number
    1. Go to Gateway of Tally > Inventory Vouchers > F8: Sales.
    2. Select the customer, stock item, and enter quantity and rate.
    3. Enable batch details, select the appropriate batch, and save the voucher (Ctrl + A).
    Example 4: Stock Adjustment for Damaged Goods
    1. Go to Gateway of Tally > Inventory Vouchers > F7: Stock Journal.
    2. Select the stock item and adjust quantity for damaged goods.
    3. Save the voucher (Ctrl + A).
    Example 5: Stock Opening Balances Entry
    1. Go to Gateway of Tally > Inventory Info > Opening Balances.
    2. Select the stock item, enter opening quantity, and rate.
    3. Specify godown details if applicable and save (Ctrl + A).

    These steps and examples provide a comprehensive guide for managing inventory information in Tally ERP 9, covering stock groups, stock categories, stock items, units of measurement, godowns, batch numbers, and various stock transactions.

  • Mastering Voucher Entry in Tally ERP 9

    In Tally ERP 9, voucher entry is the process of recording financial transactions such as payments, receipts, sales, purchases, journal entries, contra entries, debit notes, credit notes, and payment advices. Here’s how to do voucher entry in Tally ERP 9:

    Steps to Perform Voucher Entry:

    1. Open Tally ERP 9: Double-click the Tally ERP 9 icon on your desktop to launch the software.
    2. Select Company: Choose the company for which you want to perform voucher entry from the list of available companies.
    3. Access Voucher Entry Screen:
    • Go to the Gateway of Tally (main screen).
    • Navigate to the appropriate voucher entry screen based on the type of transaction you want to record. You can access voucher entry screens using shortcut keys or through the menu options.
    • For example, press F9 for purchase voucher, F8 for sales voucher, F5 for payment voucher, F6 for receipt voucher, F7 for journal voucher, F4 for contra voucher, F10 for debit note voucher, F11 for credit note voucher, and so on.

    Enter Voucher Details:

    • Once you are in the voucher entry screen, you’ll see various fields where you can enter details about the transaction.
    • Fill in the date of the transaction in the appropriate field.
    • Select the account (ledger) that is being debited or credited in the transaction. You can type the first few letters of the account name to search for it.
    • Enter the amount of the transaction in the relevant field.
    • Repeat the process for additional accounts involved in the transaction.

    Save the Voucher:

    • After entering all the necessary details, press Ctrl + A or click on the “Accept” button to save the voucher.
    • Tally will validate the entries and save the voucher if there are no errors.

    View or Print Vouchers:

    • After saving the voucher, you can view it by going to the “Display” menu and selecting “Day Book” or “Vouchers.”
    • You can also print vouchers by selecting the voucher you want to print and clicking on the “Print” button.

    Tips for Voucher Entry in Tally:

    • Always ensure that the transactions are recorded accurately to maintain the integrity of your financial data.
    • Use appropriate ledger accounts for each transaction to ensure proper classification and reporting.
    • Review the voucher entries periodically to identify any errors or discrepancies.
    • Take regular backups of your Tally data to prevent data loss.

    Example:

    Suppose you want to record a payment transaction where you paid rent amounting to ₹10,000. Here’s how you would do it in Tally ERP 9:

    1. Press F5 to access the Payment Voucher screen.
    2. Enter the date of the transaction.
    3. Select the bank account from which the payment is made.
    4. Enter ₹10,000 in the “Payment” field.
    5. Select the “Rent Expense” ledger under “Particulars” and enter ₹10,000 in the “Amount” field.
    6. Press Ctrl + A to save the voucher.

    That’s it! You have successfully recorded the payment transaction in Tally ERP 9. Repeat these steps for other transactions as needed.

    Voucher Entry Examples:

    Type 1: Payment Voucher:

    • Example: Payment of electricity bill amounting to ₹5,000.
    1. Go to Gateway of Tally > Accounting Vouchers > F5: Payment.
    2. Select the appropriate bank or cash account under “Account” field.
    3. Enter the amount of ₹5,000 in the “Payment” field.
    4. Select “Electricity Expense” under “Particulars” and enter ₹5,000 in the “Amount” field.
    5. Press Enter to save the voucher.

    Type 2: Receipt Voucher:

    • Example: Receipt of rent from tenant amounting to ₹10,000.
    1. Go to Gateway of Tally > Accounting Vouchers > F6: Receipt.
    2. Select the appropriate bank or cash account under “Account” field.
    3. Enter the amount of ₹10,000 in the “Receipt” field.
    4. Select “Rent Income” under “Particulars” and enter ₹10,000 in the “Amount” field.
    5. Press Enter to save the voucher.

    Type 3: Sales Voucher:

    • Example: Sales of goods to ABC Traders amounting to ₹20,000.
    1. Go to Gateway of Tally > Accounting Vouchers > F8: Sales.
    2. Select the sales ledger under “Account” field.
    3. Enter the amount of ₹20,000 in the “Amount” field.
    4. Select “ABC Traders” under “Particulars” and enter ₹20,000 in the “Amount” field.
    5. Press Enter to save the voucher.

    Type 4: Purchase Voucher:

    • Example: Purchase of raw materials from XYZ Suppliers amounting to ₹15,000.
    1. Go to Gateway of Tally > Accounting Vouchers > F9: Purchase.
    2. Select the purchase ledger under “Account” field.
    3. Enter the amount of ₹15,000 in the “Amount” field.
    4. Select “XYZ Suppliers” under “Particulars” and enter ₹15,000 in the “Amount” field.
    5. Press Enter to save the voucher.

    Type 5: Journal Voucher:

    • Example: Recording depreciation expense for the month amounting to ₹2,000.
    1. Go to Gateway of Tally > Accounting Vouchers > F7: Journal.
    2. Select the depreciation ledger under “Account” field.
    3. Enter the amount of ₹2,000 in the “Amount” field.
    4. Select the appropriate ledger under “Particulars” and enter ₹2,000 in the “Amount” field.
    5. Press Enter to save the voucher.

    Type 6: Contra Voucher:

    • Example: Transfer of funds from Bank Account A to Bank Account B amounting to ₹50,000.
    1. Go to Gateway of Tally > Accounting Vouchers > F4: Contra.
    2. Select Bank Account A under “From” field and Bank Account B under “To” field.
    3. Enter the amount of ₹50,000 in the “Amount” field.
    4. Press Enter to save the voucher.

    Type 7: Debit Note Voucher:

    • Example: Debit note issued to supplier for returned goods amounting to ₹7,000.
    1. Go to Gateway of Tally > Accounting Vouchers > F10: Debit Note.
    2. Select the supplier’s ledger under “Account” field.
    3. Enter the amount of ₹7,000 in the “Amount” field.
    4. Select the appropriate ledger under “Particulars” and enter ₹7,000 in the “Amount” field.
    5. Press Enter to save the voucher.

    Type 8: Credit Note Voucher:

    • Example: Credit note issued to customer for returned goods amounting to ₹3,000.
    1. Go to Gateway of Tally > Accounting Vouchers > F11: Credit Note.
    2. Select the customer’s ledger under “Account” field.
    3. Enter the amount of ₹3,000 in the “Amount” field.
    4. Select the appropriate ledger under “Particulars” and enter ₹3,000 in the “Amount” field.
    5. Press Enter to save the voucher.

    Type 9: Payment Advice Voucher:

    • Example: Payment advice issued to a vendor for the upcoming payment.
    1. Go to Gateway of Tally > Accounting Vouchers > F10: Payment Advice.
    2. Select the vendor’s ledger under “Account” field.
    3. Enter the amount and other relevant details.
    4. Press Enter to save the voucher.

    These steps illustrate how to enter different types of voucher entries in Tally ERP 9 for various financial transactions. Make sure to select the appropriate ledgers and fill in the necessary details accurately to ensure accurate accounting records.

  • Ledger Creation Examples in Tally ERP 9

    In accounting, a ledger is a principal book or record where all financial transactions of a business are recorded. It is essentially a collection of accounts, each representing a specific aspect of the business’s financial activities. Ledgers serve as the foundation for preparing financial statements and analyzing the financial health of a business.

    Components of a Ledger:

    1. Account Name: Each ledger account has a unique name that represents the type of transaction it records. For example, “Cash Account,” “Accounts Receivable,” “Sales,” etc.
    2. Date: The date of the transaction is recorded in the ledger to track when the transaction occurred.
    3. Description: A brief description of the transaction is included to provide context and clarity.
    4. Debit and Credit Columns: The ledger typically has separate columns for debit and credit entries. Debits represent amounts added to the account, while credits represent amounts deducted from the account.

    Creating a Ledger in Tally ERP 9:

    Here’s a detailed explanation of how to create a ledger in Tally ERP 9:

    1. Launch Tally ERP 9: Open the Tally ERP 9 software on your computer.
    2. Select “Accounting Vouchers”: From the gateway of Tally, navigate to “Accounting Vouchers” by pressing F2 or by selecting it from the menu.
    3. Choose “Ledger”: In the “Accounting Vouchers” screen, select the option for creating a new ledger. This is typically done by pressing Alt + C or selecting “Create” from the menu.
    4. Enter Ledger Details:
    • Name: Enter the name of the ledger. For example, if you’re creating a ledger for cash transactions, you might name it “Cash Account.”
    • Under: Specify the group under which the ledger will be categorized. Groups help organize similar types of accounts together. For example, a cash account might be categorized under the “Cash-in-Hand” group.
    • Address: Optionally, you can enter the address associated with the ledger.
    • GST Details: If applicable, enter GST-related details such as GSTIN, State, etc.
    • Opening Balance: If you’re creating the ledger at the beginning of a financial period and there’s an opening balance, you can enter it here.
    • Save: After entering all the necessary details, save the ledger by pressing Ctrl + A or selecting “Yes” when prompted to save.

    Examples of Creating Ledgers:

    Example 1: Cash Account:

    • Name: Cash Account
    • Under: Cash-in-Hand
    • Opening Balance: ₹1000

    Example 2: Sales Account:

    • Name: Sales Account
    • Under: Direct Income
    • Opening Balance: ₹0 (Sales accounts typically start with zero balance)

    Example 3: Accounts Receivable:

    • Name: Accounts Receivable
    • Under: Sundry Debtors
    • Opening Balance: ₹5000

    Example 4: Accounts Payable:

    • Name: Accounts Payable
    • Under: Sundry Creditors
    • Opening Balance: ₹2000

    Example 5: Bank Account:

    • Name: Bank Account
    • Under: Bank Accounts
    • Opening Balance: ₹5000

    Example 6: Rent Expense:

    • Name: Rent Expense
    • Under: Indirect Expenses
    • Opening Balance: ₹0

    Example 7: Salary Payable:

    • Name: Salary Payable
    • Under: Current Liabilities
    • Opening Balance: ₹0

    Example 8: Purchase Account:

    • Name: Purchase Account
    • Under: Direct Expenses
    • Opening Balance: ₹0

    Example 9: Office Equipment:

    • Name: Office Equipment
    • Under: Fixed Assets
    • Opening Balance: ₹50000

    Example 10: Loan Payable:

    • Name: Loan Payable
    • Under: Loans (Long-term Liabilities)
    • Opening Balance: ₹100000

    Example 11: Advertising Expenses:

    • Name: Advertising Expenses
    • Under: Indirect Expenses
    • Opening Balance: ₹0

    Example 12: Equity Capital:

    • Name: Equity Capital
    • Under: Capital Account
    • Opening Balance: ₹0

    These examples cover various aspects of a business’s financial transactions, including accounts for cash, sales, accounts receivable, accounts payable, bank balances, expenses, assets, liabilities, and equity. Properly setting up and maintaining ledgers in Tally ERP 9 ensures accurate financial record-keeping and reporting.

  • Tally.ERP 9: Introduction and Installation Guide

    Introduction to Tally.ERP 9:

    Tally.ERP 9 stands as a robust business management software solution meticulously crafted to streamline and automate various financial and accounting processes across businesses of diverse scales. Developed by Tally Solutions Pvt. Ltd., Tally.ERP 9 has gained widespread acclaim globally for its user-friendly interface, extensive features, and scalability.

    With Tally.ERP 9, businesses can proficiently manage a spectrum of financial transactions, inventory, payroll, compliance, and other pivotal aspects of their operations. This software furnishes an array of modules and functionalities tailored to suit diverse business requisites, enabling organizations to uphold precise financial records, generate profound reports, and make well-informed decisions.

    One of Tally.ERP 9’s primary strengths lies in its adaptability and flexibility across various industries and business environments. Irrespective of whether it caters to a fledgling startup, a mid-sized enterprise, or a corporate giant, Tally.ERP 9 can be meticulously customized and configured to align with specific requirements, thereby ensuring seamless integration with prevailing workflows and processes.

    From managing invoicing and taxation to facilitating budgeting and financial analysis, Tally.ERP 9 equips businesses with the requisite tools to remain compliant, enhance efficiency, and foster growth. Its intuitive interface and robust features empower users to navigate financial intricacies with ease, while its stringent security measures guarantee data integrity and confidentiality.

    Overall, Tally.ERP 9 stands as the preferred choice for businesses in quest of a reliable and efficient accounting software solution. With its continual updates and enhancements, Tally Solutions remains steadfast in its commitment to aiding businesses worldwide in streamlining operations and realizing their financial aspirations.

    How to Install Tally.ERP 9 from the Tally Official Site:

    1. Visit the Official Website: Initiate your web browser and navigate to the official Tally Solutions website. You can seamlessly locate it by entering “Tally Solutions” in your preferred search engine.
    2. Access the Downloads Section: Once you’ve reached the Tally Solutions website, head to the “Downloads” section. Typically, this section houses links for downloading the latest iteration of Tally.ERP 9.
    3. Select Your Edition: Tally.ERP 9 proffers a variety of editions, including Silver (for single users) and Gold (for multiple users). Evaluate your requirements and opt for the edition that best aligns with your necessities.
    4. Download the Installer: Click on the download link corresponding to the chosen edition. The website will provide explicit instructions for downloading the installer file.
    5. Save the Installer: Upon clicking the download link, your browser will prompt you to save the installer file. Elect a suitable location on your computer to save the file and initiate the download by clicking “Save” or “Download”.
    6. Execute the Installer: Following the completion of the download, navigate to the location where the installer file is stored on your computer. Double-click the file to commence the installation wizard.
    7. Follow Installation Instructions: The installation wizard will diligently steer you through the installation process. Pay heed to the on-screen prompts and instructions to seamlessly install Tally.ERP 9 on your computer.
    8. Activate the Software (if Necessary): Depending on the edition you’ve opted for, you may need to activate the software employing the license details furnished by Tally Solutions. Follow the activation process delineated during the installation or subsequent to its culmination.
    9. Complete the Installation: Once the installation and potential activation processes are concluded, you’re poised to commence utilizing Tally.ERP 9 for your accounting and business management exigencies.

    It is of paramount importance to ensure that you download Tally.ERP 9 exclusively from the official Tally Solutions website to avert any potential risks associated with downloading unauthorized versions of the software. Always adhere to the official instructions dispensed by Tally Solutions throughout the installation process to ensure a seamless experience.