VAT entry in Tally.ERP 9 is essential for businesses to accurately record Value Added Tax transactions. Below, I will guide you through the process step-by-step, including examples and explanations:
Step 1: Create VAT Ledgers
- Access Ledger Creation: Open Tally.ERP 9 and navigate to Gateway of Tally > Accounts Info > Ledgers > Create.
- Create VAT Ledger: Create a ledger named ‘VAT Input’ and ‘VAT Output’ under the group ‘Duties & Taxes’.
Step 2: Enable VAT in Tally
- Activate VAT: Go to Gateway of Tally > F11: Features > F3: Statutory & Taxation.
- Enable VAT: Set ‘Enable Value Added Tax (VAT)’ to ‘Yes’.
Step 3: Make Sales Entry with VAT
- Create Sales Voucher: Go to Gateway of Tally > Accounting Vouchers > F8: Sales.
- Enter Sales Details: Fill in the necessary details like the party’s name, invoice number, date, and sales amount (e.g., Rs. 10,000).
- Select VAT Ledger: In the Accounting Voucher screen, under Particulars, select the sales ledger and enter the sales amount.
- Specify VAT Rate: In the Tax Analysis screen, select the VAT ledger and enter the applicable VAT rate (e.g., 12.5%).
Step 4: Record Purchase Entry with VAT
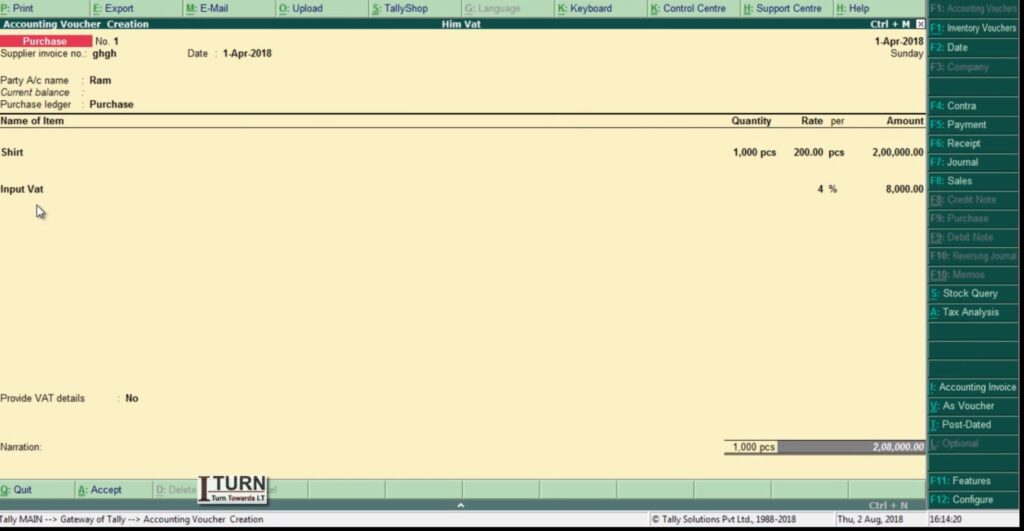
- Create Purchase Voucher: Go to Gateway of Tally > Accounting Vouchers > F9: Purchase.
- Enter Purchase Details: Fill in the necessary details like the supplier’s name, invoice number, date, and purchase amount (e.g., Rs. 8,000).
- Select VAT Ledger: In the Accounting Voucher screen, under Particulars, select the purchase ledger and enter the purchase amount.
- Specify VAT Rate: In the Tax Analysis screen, select the VAT ledger and enter the applicable VAT rate (e.g., 12.5%).
Step 5: View VAT Reports
- Access VAT Reports: Go to Gateway of Tally > Display > Statutory Reports > VAT.
- Generate VAT Computation: Select the period for which you want to view the VAT computation.
- Review VAT Details: You can view details like total sales, total purchases, input VAT, output VAT, and VAT payable.
Example:
Let’s consider a scenario:
- Sales amount: Rs. 50,000
- Purchase amount: Rs. 30,000
- VAT rate: 12.5%
Sales Entry:
- Create a sales voucher.
- Enter the sales details: Party name, invoice number, date, and sales amount (Rs. 50,000).
- Select the sales ledger and enter the sales amount.
- Specify the VAT rate as 12.5%.
Purchase Entry:
- Create a purchase voucher.
- Enter the purchase details: Supplier’s name, invoice number, date, and purchase amount (Rs. 30,000).
- Select the purchase ledger and enter the purchase amount.
- Specify the VAT rate as 12.5%.
Summary:
- Enable VAT in Tally.
- Create VAT ledgers for input and output.
- Record sales and purchase transactions separately.
- Specify the VAT rate for each transaction.
- Review VAT reports to ensure accurate computation.
By following these steps and example, you can effectively manage VAT entries in Tally.ERP 9 for your business transactions.