Category: Computer Skills

  • Fixed the WORST Blue Screen Error on Windows! (BSOD)

    Nothing is more frustrating for a Windows user than the Blue Screen of Death (BSOD). It appears out of nowhere, halts your work, and flashes confusing error codes. But even the “worst” blue screen errors can be fixed with the right steps. This comprehensive guide explains what BSOD is, why it happens, and shows a proven, step-by-step process to repair it.


    What Is a BSOD?

    The BSOD is Windows’ built-in safety stop. When the system encounters a critical fault it cannot recover from, it stops everything, shows a blue screen with an error code and automatically restarts to protect data and hardware.


    Why Blue Screen Errors Happen

    CauseDescriptionCommon Error Codes
    Corrupt system filesDamaged Windows core files from improper shutdowns, malware, or bad updatesCRITICAL_PROCESS_DIED, SYSTEM_SERVICE_EXCEPTION
    Outdated or faulty driversGraphics, storage or network drivers not matching hardwareDRIVER_IRQL_NOT_LESS_OR_EQUAL, VIDEO_TDR_FAILURE
    Hardware faultsBad RAM, failing hard drive, overheating CPU/GPUMEMORY_MANAGEMENT, PAGE_FAULT_IN_NONPAGED_AREA
    BIOS/UEFI misconfigurationsOverclocking or wrong firmware settingsKERNEL_SECURITY_CHECK_FAILURE
    Malware or virusesMalicious code destabilising the systemVARIOUS STOP CODES

    Step-by-Step Fix for the Worst BSOD

    1. Capture the Error Code

    Take a photo or note the exact STOP code shown on the blue screen. This is your primary clue.

    2. Boot Into Safe Mode

    If Windows keeps rebooting, enter Safe Mode via Advanced Startup → Troubleshoot → Startup Settings → Restart → choose Safe Mode with Networking. Safe Mode loads minimal drivers, making repairs easier.

    3. Update or Roll Back Drivers

    Open Device Manager, right-click the suspect hardware and choose Update driver. If the crash began after an update, choose Roll Back driver instead. Pay special attention to graphics, chipset and storage drivers.

    4. Repair Corrupt System Files

    Run Command Prompt (Admin) and execute:

    sfc /scannow
    DISM /Online /Cleanup-Image /RestoreHealth
    

    This automatically scans and repairs Windows core files.

    5. Install Latest Windows Updates

    Go to Settings → Windows Update and install all critical updates. Microsoft routinely releases patches for BSOD issues.

    6. Test RAM and Storage

    Use Windows Memory Diagnostic to check your RAM. Run chkdsk /f /r on your drives to find and fix disk errors.

    7. Scan for Malware

    Perform a full system scan with Windows Security or a reputable antivirus to rule out malicious code.

    8. Reset BIOS/UEFI Settings

    If you’ve overclocked your hardware or tweaked firmware, restore defaults in BIOS/UEFI. Incorrect voltage or frequency settings can trigger BSODs.

    9. Last Resort: Repair or Reinstall Windows

    If the above steps fail, back up your data and perform a Repair Install or a clean Windows reinstall to get a fresh system environment.


    Quick Action Checklist

    ✅ ActionStatus
    Error code noted☐
    Booted into Safe Mode☐
    Drivers updated or rolled back☐
    SFC & DISM run☐
    Windows updates installed☐
    RAM and storage tested☐
    Malware scan completed☐
    BIOS/UEFI reset☐
    Windows repaired/reinstalled☐

    Tick each box as you progress to systematically eliminate the error.


    Preventing Future BSODs

    • Keep Windows and all drivers up to date.
    • Download drivers only from official sources.
    • Maintain proper cooling to avoid overheating.
    • Use a UPS to prevent sudden power cuts.
    • Run periodic malware scans.
    • Avoid unnecessary overclocking.

    These habits dramatically reduce the chance of another blue screen.


    Conclusion

    Even the “worst” Blue Screen of Death isn’t the end of your PC. By carefully identifying the error, updating drivers, repairing system files and testing hardware, you can restore stability to Windows and prevent future crashes.


    Disclaimer

    This article is for informational and educational purposes only. Perform any system changes or hardware tests at your own risk. Always back up important data before making major changes to your computer.

  • How to Fix Microsoft Visual Basic Run-Time Error 1004 in Excel VBA

    Microsoft Excel is the backbone of many business operations. From simple data entry to complex financial modelling, VBA (Visual Basic for Applications) macros save hours of manual work. However, one common stumbling block for users and developers alike is the dreaded “Run-time Error 1004”.

    This error can interrupt your macros unexpectedly, break automated reports, and frustrate even experienced Excel users. In this article, we’ll explain what this error means, why it occurs, and give you a step-by-step guide to fix it permanently.


    What Is Run-Time Error 1004?

    Run-Time Error 1004 is an “Application-defined or object-defined error.” In plain terms, VBA tried to execute a command that Excel could not perform—often because of a wrong object reference, invalid range, missing file path, or a protected sheet.


    Common Causes of Error 1004

    CauseDescriptionExample Scenario
    Wrong Worksheet NameMacro refers to a sheet that doesn’t existSheets("Data").Range("A1") but “Data” sheet is renamed
    Range/Cell Not AvailableTrying to access a cell outside used range or on a hidden sheetUsing Range("Z1000") on a small sheet
    File Path ErrorsAttempting to open or save a workbook at an incorrect pathWorkbooks.Open "C:\Reports\Jan.xlsx" but file not present
    Protected SheetTrying to write into a locked cellMacro edits protected sheet without unprotecting
    Excessive Use of .SelectSelecting objects before working on them leads to instabilitySheets("Data").Select then Range("A1").Select
    Missing Named RangeMacro references a named range that no longer existsRange("MyRange") but the name is deleted

    Step-By-Step Fix for Run-Time Error 1004

    1. Identify the Failing Line

    Run the macro using F8 (Step Into) in the VBA editor. When the error pops up, the highlighted line is where the problem occurs.

    2. Fully Qualify Your Objects

    Always specify the workbook, worksheet, and range together:

    ThisWorkbook.Sheets("Sheet1").Range("A1").Value = "Hello"
    

    3. Avoid .Select and .Activate

    Directly manipulate objects instead of selecting them:

    'Bad:
    Sheets("Data").Select
    Range("A1").Select
    ActiveCell.Value = "Hello"
    
    'Good:
    ThisWorkbook.Sheets("Data").Range("A1").Value = "Hello"
    

    4. Verify File Paths and Sheet Names

    Double-check your workbook paths and sheet names. A typo is the most common cause.

    5. Unprotect Sheets Before Editing

    If your macro writes to a protected sheet, use:

    Sheets("Data").Unprotect "password"
    '... your code ...
    Sheets("Data").Protect "password"
    

    6. Create Named Ranges Before Using Them

    Ensure any named range referenced by the macro exists in the workbook.

    7. Use Error Handling to Prevent Crashes

    On Error GoTo ErrorHandler
    'Your code here
    Exit Sub
    
    ErrorHandler:
    MsgBox "Error " & Err.Number & ": " & Err.Description
    

    This will display a user-friendly message instead of halting the macro.


    Quick Troubleshooting Checklist

    ✅ Check✅ Done
    Sheet names spelled correctly☐
    Workbook path exists☐
    Fully qualified references used☐
    .Select and .Activate removed☐
    Sheets unprotected before editing☐
    Named ranges exist☐

    Tick these boxes as you review your code to systematically eliminate the error.


    Best Practices to Avoid Error 1004 in Future

    • Always fully qualify objects (Workbook → Worksheet → Range).
    • Keep file paths dynamic by using ThisWorkbook.Path.
    • Minimize or remove .Select and .Activate.
    • Maintain a consistent naming convention for sheets and ranges.
    • Wrap critical code blocks in error handlers.

    Conclusion

    Run-Time Error 1004 is one of the most common VBA errors in Excel, but it’s also one of the easiest to fix once you understand its causes. By qualifying your objects, verifying file paths and sheet names, and using robust error handling, you can make your macros stable and reliable.


    Disclaimer

    This article is intended for informational and educational purposes only. All examples and code snippets are provided “as is” without warranty of any kind. Test any changes in a backup copy of your workbook before applying them to live data.


  • Advanced Certificate in Digital Marketing & Communication by MICA & upGrad

    In today’s fast-paced digital world, mastering digital marketing and communication is no longer optional—it’s essential for career growth. The Advanced Certificate in Digital Marketing & Communication offered by MICA in collaboration with upGrad equips professionals with the skills, strategies, and hands-on experience needed to excel in the competitive marketing landscape.

    This online program combines live sessions, mentorship, and practical projects, enabling participants to gain expertise in SEO, SEM, social media marketing, AI-driven analytics, and much more. If you are ready to advance your career in digital marketing, you can enroll in the course here.


    🔹 Why Choose the MICA & upGrad Digital Marketing Program?

    1. Industry-Recognized Certification – Receive an Advanced Certificate from MICA, one of India’s premier marketing institutes.
    2. Hands-On Learning – Work on real-world projects and capstone assignments to apply theoretical knowledge.
    3. Expert Mentorship – Interact with seasoned professionals who guide you through industry best practices.
    4. Flexible Online Mode – Study from anywhere with live interactive sessions and 24/7 resources.
    5. Specializations in Digital Tools & AI – Learn generative AI applications, data visualization, and content creation strategies.

    Pro Tip: Secure your spot and explore the full curriculum here.


    📚 Program Curriculum Overview

    The program spans 31 weeks, covering every aspect of digital marketing and communication. Below is a detailed breakdown:

    ModuleDurationKey Learnings
    Digital Marketing Fundamentals3 weeksMarketing basics, digital landscape, KPIs, transition from traditional marketing
    Digital Channels – Part I4 weeksWebsite optimization, social media marketing, content strategy
    Digital Channels – Part II10 weeksSEM, programmatic & display ads, paid search advertising
    Marketing Analytics & Strategy3 weeksWeb analytics, integrated strategy, campaign measurement
    Capstone & e-Commerce Bootcamp3 weeksReal-world project, e-commerce operations, campaign implementation

    Participants can specialize in AI-based content creation, text, image, audio/video content, or data visualization, allowing customization to personal career goals.


    🌟 Benefits of the Program

    • Gain in-demand digital marketing skills applicable across industries.
    • Enhance your LinkedIn and professional profile with MICA certification.
    • Access networking opportunities through live sessions and alumni community.
    • Prepare for high-paying roles in digital marketing, SEO, content, and e-commerce.

    Ready to start your digital marketing journey? Click here to enroll.


    💡 Career Opportunities After Completion

    Graduates of this program can pursue roles such as:

    • Digital Marketing Manager
    • SEO/SEM Specialist
    • Social Media Strategist
    • Content Marketing Head
    • E-commerce Manager
    • Marketing Analytics Expert

    Example: Professionals who completed this course have successfully moved into leadership roles managing campaigns for brands, improving ROI, and leveraging AI for data-driven marketing strategies.


    ✅ Pros and Cons

    Pros:

    • Industry-recognized certification from MICA
    • Practical learning with real-world projects
    • Flexible online schedule for working professionals
    • Mentorship and networking opportunities

    Cons:

    • Requires consistent commitment for 31 weeks
    • Intense curriculum for beginners without marketing knowledge
    • Higher fee than basic online courses (Rs. 3,00,000 approx.)

    ❓ Frequently Asked Questions (FAQs)

    Q1: What is the duration of the course?

    • The program spans 31 weeks, including live sessions, projects, and bootcamps.

    Q2: Is this course suitable for beginners?

    • Yes, the program covers fundamentals, but prior knowledge of marketing or work experience is recommended.

    Q3: Will I receive a certificate?

    • Yes, an Advanced Certificate from MICA will be awarded after completion.

    Q4: Are live sessions included?

    • Absolutely, the course includes interactive online sessions with industry mentors.

    Q5: Can I access the course after completion?

    • Yes, students have continued access for reference and project completion.

    Q6: How can I enroll?


    🔹 Conclusion

    The Advanced Certificate in Digital Marketing & Communication by MICA and upGrad is perfect for professionals looking to upskill in digital marketing, gain practical experience, and enhance career opportunities. With expert mentorship, hands-on projects, and an industry-recognized certification, this program equips participants with the tools to succeed in the ever-evolving digital landscape.

    📢 Call-to-Action: Don’t miss out on the opportunity to transform your career. Enroll now and get started on your digital marketing journey.


    ⚠️ Disclaimer

    This article is for informational purposes only. All information is based on publicly available sources and program details. The author is not responsible for decisions made based on this content. Please refer to the official course page for the latest updates.


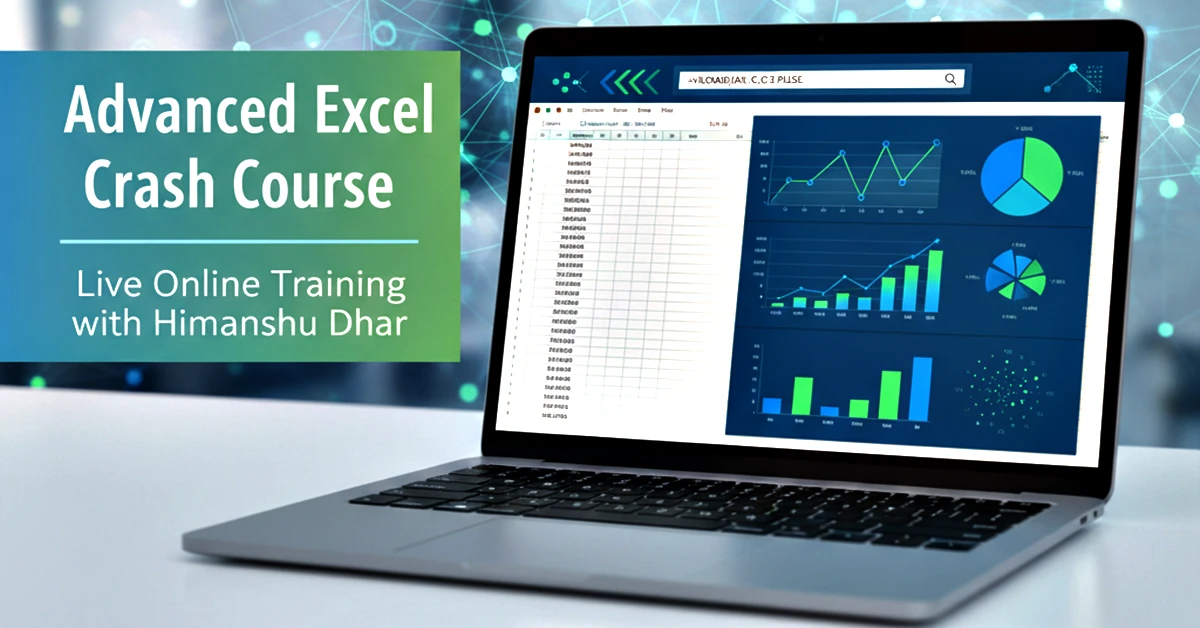
  • Master Advanced Excel in Just 10 Days – Online Live Training with Himanshu Dhar

    Master Advanced Excel in Just 10 Days – Online Live Training with Himanshu Dhar

    Unlock the power of Excel and transform the way you work with data! Whether you’re a professional looking to boost productivity, an analyst aiming for precision, or a manager wanting smarter reporting, our Advanced Excel Crash Course is designed for you.

    With live online classes, hands-on exercises, and real-world scenarios, you’ll learn how to use Excel like a pro in just 10 sessions.


    Course Highlights

    • Trainer: Himanshu Dhar – Experienced Excel Professional & Educator
    • Mode: Online Live Training – Attend from anywhere
    • Duration: 10 Hours (1 Hour per Day, 10 Days)
    • Certificate: Issued by I Turn Institute Pvt Ltd, a well-recognized authority
    • Doubt Clearance: Available for 6 months
    • Course Access Validity: 6 months

    Why This Course is Perfect for Professionals

    Excel is the backbone of modern business. From financial analysis to reporting, from dashboards to automation, Advanced Excel skills are essential. In this course, you’ll learn:

    • Advanced formulas: SUMIFS, COUNTIFS, AVERAGEIFS, IF, AND, OR, nested formulas, VLOOKUP, INDEX-MATCH, Array lookups
    • Data analysis & automation: Pivot Tables, Conditional Formatting, Data Validation, Dynamic Charts
    • Professional reporting: Sort, Filter, Custom Sort, Chart Preparation, Date & Time calculations
    • Security & flexibility: Protect sheets, hide formulas, allow editable ranges

    10-Day Course Structure

    DayTopicKey Takeaways
    Day 1Excel Structure & NavigationWorkbooks, Sheets, Ribbon customization, Autofill options
    Day 2Math FunctionsSUM, AVERAGE, COUNT, MAX, MIN, ROUND, LARGE, SMALL, SUMIF, COUNTIF, AVERAGEIF
    Day 3Conditional AggregationSUMIFS, COUNTIFS, AVERAGEIFS, Wildcards, Filter, Advanced Filter, Sort
    Day 4Conditional Formatting & ProtectionHighlight rules, protect sheets, hide formulas, allow editable ranges
    Day 5Logical FunctionsIF, Nested IF, AND, OR
    Day 6Lookup FunctionsVLOOKUP, IFERROR with VLOOKUP, Array VLOOKUP
    Day 7Advanced LookupINDEX & MATCH, Nested INDEX-MATCH, Lookup tricks, VLOOKUP TRUE
    Day 8Pivot TablesComplete pivot table functionality, calculated fields, grouping, slicers
    Day 9Chart PreparationColumn, Line, Pie, Combo charts, formatting, dynamic charts
    Day 10Data Validation & Date/TimeDrop-down lists, input restrictions, DATE, TIME, TODAY, NOW, NETWORKDAYS

    Fee & Special Discount

    • Original Fee: ₹3000
    • Special Discounted Fee: ₹2100

    Invest in yourself and gain skills that save hours of work every week!


    Why Choose This Course?

    1. Live Training: Get instant clarification on doubts from Himanshu Dhar, an expert trainer.
    2. Certificate: Showcase your skills with a recognized certificate from I Turn Institute Pvt Ltd.
    3. 6 Months Doubt Support: Ask questions anytime for up to 6 months after course completion.
    4. Practical Learning: Every session includes hands-on exercises with real-world datasets.
    5. Flexible Access: Course validity of 6 months, allowing learning at your own pace.

    About Your Trainer: Himanshu Dhar

    Learn from Himanshu Dhar, a dedicated MIS and Excel trainer with over 14 years of experience in data management and automation. Himanshu has trained more than 25,000 students across corporate and individual programs, focusing on practical Excel, Macros, and VBA skills that can be applied in real-world projects.

    Check his Udemy profile for courses, ratings, and student reviews: Himanshu Dhar on Udemy


    Who Should Enroll?

    • Professionals aiming to enhance Excel skills for business analysis
    • Managers preparing reports and dashboards
    • Students and job seekers who want to strengthen their Excel resume
    • Anyone wanting practical, advanced Excel skills to save time and improve productivity

    Enroll Now – Book Your Free Demo!

    Take the first step towards mastering Advanced Excel today!

    • Free 30-Minute Demo / Consultation: Book a session with Himanshu Dhar to experience the course before enrolling.
    • WhatsApp Enrollment & Enquiry: 📱 7827979099

    Fee after Discount: ₹2100

    Don’t miss this opportunity to enhance your career with Advanced Excel skills – all from the comfort of your home!


  • Windows 10/11 Stuck on “Diagnosing Your PC” or “Preparing Automatic Repair”? Here’s How to Fix It

    Seeing “Diagnosing your PC” or “Preparing Automatic Repair” on a black screen when starting Windows 10 or 11 can be frustrating. This loop happens when Windows detects a startup problem but fails to fix it automatically.

    Below is a detailed guide on why it happens and step-by-step fixes you can try at home.


    🔎 Why This Happens

    Common causes of being stuck on “Diagnosing your PC” or “Preparing Automatic Repair” include:

    • Corrupted system files (e.g. after improper shutdown or power failure).
    • Damaged boot sector or Master Boot Record (MBR).
    • Faulty or newly added hardware (RAM, HDD/SSD).
    • Outdated or conflicting drivers.
    • Windows updates that didn’t complete properly.
    • Malware or disk errors.

    ✅ Quick Fixes Before Advanced Steps

    1️⃣ Hard Reboot

    Hold the power button for 10 seconds to shut down. Disconnect all USB drives, external HDDs, printers, etc. Restart PC.

    2️⃣ Boot Into Safe Mode

    • Turn PC on. As soon as Windows logo appears, press Power to force shutdown. Repeat 3 times — this forces Advanced Startup.
    • Select Troubleshoot > Advanced Options > Startup Settings > Restart > Press 4 (Enable Safe Mode).
      If you can log in Safe Mode, uninstall recently added software or drivers.

    3️⃣ Run Startup Repair

    • In Advanced Startup (above), select Troubleshoot > Advanced Options > Startup Repair.
    • Let Windows try to repair boot issues.

    🔧 Advanced Solutions

    A. Run System File Checker (SFC) & DISM

    1. Boot into Advanced Startup > Command Prompt.
    2. Type: sfc /scannow
    3. Then run: DISM /Online /Cleanup-Image /RestoreHealth

    B. Repair Boot Configuration

    In Command Prompt:

    bootrec /fixmbr
    bootrec /fixboot
    bootrec /scanos
    bootrec /rebuildbcd
    

    Restart PC after each.

    C. Check Disk for Errors

    chkdsk C: /f /r
    

    D. System Restore

    • Advanced Startup > Troubleshoot > Advanced Options > System Restore.
    • Choose a restore point created before the issue.

    E. Uninstall Recent Updates

    • Advanced Startup > Troubleshoot > Advanced Options > Uninstall Updates.
    • Remove latest quality or feature update.

    F. Reset This PC (Keep Files)

    If nothing works:

    • Advanced Startup > Troubleshoot > Reset This PC > Keep my files.

    📝 Quick Reference Table

    SymptomFix
    Loop on Diagnosing your PCHard reboot, disconnect peripherals
    Safe Mode boots fineUninstall recent drivers/programs
    Still stuckStartup Repair from Advanced Options
    Corrupted filesSFC /scannow & DISM
    Boot errorsbootrec commands to rebuild BCD
    Disk errorschkdsk /f /r
    Updates issueUninstall latest update
    Nothing worksReset PC (keep files)

    💡 Tips to Prevent Future Issues

    • Keep Windows & drivers updated.
    • Shut down properly; avoid forced power-offs.
    • Regularly back up data.
    • Use a UPS to prevent power-related corruption.

    ⚠️ Disclaimer

    Some fixes involve Command Prompt and system settings. Proceed carefully; if unsure, seek professional help. Always back up important data first.


  • Your Connection Is Not Private Error in Chrome – Causes & Easy Fixes

    If you’ve ever opened a website in Google Chrome and seen the scary message “Your Connection is Not Private”, you’re not alone. This warning appears when Chrome detects that your connection may not be secure. The browser blocks the page to protect your personal data (like passwords or credit card info).

    This article explains why the error appears and how to fix it quickly on Windows, macOS, Android, and iOS.


    🔎 Why Does “Your Connection Is Not Private” Error Appear?

    Chrome shows this error when it cannot validate the website’s SSL certificate. Common reasons include:

    • Incorrect date & time on your device.
    • Expired, misconfigured or self-signed SSL certificate on the website.
    • Antivirus or firewall interfering with HTTPS.
    • Public Wi-Fi networks requiring sign-in first.
    • Cached or corrupted cookies in your browser.
    • Outdated browser or operating system.

    The error codes may also appear as: NET::ERR_CERT_AUTHORITY_INVALID, NET::ERR_CERT_DATE_INVALID, etc.


    ✅ Step-by-Step Fixes for “Your Connection Is Not Private” Error

    1️⃣ Refresh the Page

    Sometimes the error is temporary. Press Ctrl + F5 (Windows) or Cmd + Shift + R (Mac) to force reload.

    2️⃣ Check Date and Time Settings

    • Go to Settings > Time & Date.
    • Enable Automatic time.
    • Restart Chrome.

    3️⃣ Clear Browsing Data

    • Chrome menu → Settings > Privacy and security > Clear browsing data.
    • Select Cached images and files & Cookies → Clear data.

    4️⃣ Update Chrome

    • Chrome menu → Help > About Google Chrome.
    • Install updates & relaunch.

    5️⃣ Disable Antivirus HTTPS Scanning

    • Open your antivirus (Avast, Kaspersky, etc.).
    • Turn off “HTTPS scanning” or “SSL scanning”.
    • Restart Chrome.

    6️⃣ Use Incognito Mode

    • Press Ctrl + Shift + N (Windows) or Cmd + Shift + N (Mac).
    • See if the site opens there — if yes, the issue is with extensions or cache.

    7️⃣ Check Wi-Fi or Network

    • On public Wi-Fi (airport, café), you must first accept the portal’s terms (open a non-HTTPS site like http://example.com to trigger login).

    8️⃣ Proceed with Caution (Advanced)

    • Click Advanced > Proceed to site (unsafe) only if you’re sure the site is trustworthy.
    • Avoid entering sensitive info.

    📝 Quick Fix Table

    IssueFix
    Wrong date/timeEnable automatic time & restart
    Corrupted cacheClear cookies & cache in Chrome
    Outdated ChromeUpdate browser to latest version
    Antivirus interferenceDisable HTTPS/SSL scanning
    Public Wi-Fi loginOpen non-HTTPS page to sign in
    Faulty extensionsTry incognito / disable extensions

    💡 Extra Tips

    • If the error appears on every website, your device time or antivirus is almost always the cause.
    • If the error appears only on one website, it’s likely the site’s certificate — not your browser.
    • On Android/iOS, also check system updates and clear the Chrome app cache.

    ⚠️ Disclaimer

    The “Your Connection is Not Private” warning is there to protect you. Always be cautious when bypassing it. Only proceed if you trust the website and know it’s safe.


  • How to Fix “Windows Cannot Connect to the Printer” Error

    One of the most common issues Windows users face is the “Windows cannot connect to the printer” error when trying to add or use a printer. This error can occur on Windows 10 and Windows 11 systems and can stop you from printing documents entirely. In this guide, we’ll explain the causes and provide step-by-step solutions.


    🔎 Why This Error Happens

    • Incorrect Printer Drivers – Outdated or incompatible drivers prevent Windows from communicating with the printer.
    • Print Spooler Problems – The Windows Print Spooler service may be stuck or corrupted.
    • Network/Shared Printer Issues – Shared printers may have permission or connectivity issues.
    • Registry or Policy Conflicts – Incorrect settings or restrictions may block the printer connection.
    • Firewall/Antivirus Interference – Security software sometimes blocks network printers.

    ✅ How to Fix “Windows Cannot Connect to the Printer” Error

    1. Restart Your Printer and PC

    • Power off the printer and your computer.
    • Turn them back on after 30 seconds.
    • Try reconnecting.

    2. Run the Windows Printer Troubleshooter

    • Go to Settings → Devices → Printers & scanners.
    • Click your printer → Manage → Run the troubleshooter.
    • Follow the on-screen instructions to automatically detect and fix issues.

    3. Update or Reinstall Printer Drivers

    • Open Device Manager → Printers.
    • Right-click your printer → Update driver.
    • Or go to the manufacturer’s website and download the latest drivers.
    • If still not working, uninstall the printer completely and reinstall it.

    4. Restart the Print Spooler Service

    • Press Windows + R, type services.msc, press Enter.
    • Find Print Spooler, right-click → Restart.
    • If problems persist, right-click Print Spooler → Properties, set Startup type to Automatic.

    5. Add Printer Manually Using IP Address

    • Settings → Devices → Printers & scanners → Add a printer or scanner.
    • If it doesn’t find your printer, click The printer that I want isn’t listed.
    • Choose Add a printer using TCP/IP address or hostname and follow prompts.

    6. Check Network & Firewall

    • Ensure the printer and your PC are on the same network.
    • Temporarily disable firewall/antivirus to see if it’s blocking the connection.

    7. Edit Windows Registry (Advanced Users)

    If you’re adding a shared printer and getting an error like 0x0000011b, you may need to adjust a registry key:

    • Press Windows + R, type regedit.
    • Go to: HKEY_LOCAL_MACHINE\System\CurrentControlSet\Control\Print
    • Right-click in the right pane → New → DWORD (32-bit) named RpcAuthnLevelPrivacyEnabled.
    • Set value to 0.
    • Restart your PC.

    (Backup your registry first!)


    📝 Quick Fix Table

    StepActionPurpose
    1Restart printer & PCClear temporary glitches
    2Windows TroubleshooterAuto-detect & fix issues
    3Update/Reinstall driversResolve driver conflicts
    4Restart Print SpoolerReset printing system
    5Add printer via IPDirect connection
    6Check Firewall/NetworkEliminate blocks
    7Edit Registry (Advanced)Fix 0x0000011b & other errors

    ❓ FAQs

    Q1. Why does Windows say it can’t connect to my printer?
    Usually due to driver, spooler, or network permission issues.

    Q2. Will reinstalling the printer delete my documents?
    No. It only removes the printer entry, not your files.

    Q3. How do I fix error code 0x0000011b?
    Use the registry tweak above or update your Windows build; Microsoft patched this in newer updates.

    Q4. Can antivirus block printers?
    Yes. Temporarily disable your antivirus to test.


    ⚠️ Disclaimer

    This guide provides general steps to fix the “Windows cannot connect to the printer” error. Some solutions involve system changes — proceed carefully and back up your system or registry first.


  • How to Fix “Your PC Ran Into a Problem and Needs to Restart” Error in Windows

    If you’ve ever seen the “Your PC Ran Into a Problem and Needs to Restart” message, followed by a Blue Screen of Death (BSOD), you know how frustrating it can be. This error can occur on Windows 10 or Windows 11 and is usually caused by system file corruption, driver conflicts, hardware issues, or recent updates.

    In this guide, we’ll explain the causes of this error and provide step-by-step solutions to fix it.


    What Causes “Your PC Ran Into a Problem” Error?

    1. Corrupted System Files
      • Missing or damaged Windows files can trigger a restart loop.
    2. Driver Conflicts or Outdated Drivers
      • Graphics, network, or storage drivers may be incompatible or outdated.
    3. Recent Windows Update
      • Sometimes updates introduce bugs or conflicts that cause system instability.
    4. Hardware Issues
      • Failing hard drives, RAM problems, or overheating can trigger BSODs.
    5. Malware or Virus Infection
      • Malicious software can corrupt critical system files.

    Step-by-Step Fixes

    1. Restart Your PC

    • A simple restart can sometimes fix minor glitches.
    • Disconnect external devices like USB drives to rule out conflicts.

    2. Boot Into Safe Mode

    Safe Mode loads Windows with minimal drivers:

    1. Turn off your PC → Turn it on → Press F8 or Shift + F8 (Windows 10/11 may require multiple tries).
    2. Navigate to Troubleshoot → Advanced Options → Startup Settings → Enable Safe Mode.
    3. Once in Safe Mode, you can uninstall recent updates or problematic drivers.

    3. Uninstall Problematic Updates

    • Go to Settings → Update & Security → Windows Update → View update history → Uninstall updates.
    • Remove the most recent updates causing the issue.

    4. Run System File Checker (SFC) and DISM

    Corrupted system files are a common cause:

    1. Open Command Prompt as Administrator.
    2. Run:
    sfc /scannow
    DISM /Online /Cleanup-Image /RestoreHealth
    
    • SFC checks and repairs corrupted files.
    • DISM repairs the Windows image if needed.

    5. Check Disk for Errors

    • Open Command Prompt → type:
    chkdsk /f /r C:
    
    • Press Y to schedule a check on next restart.
    • This fixes bad sectors and disk errors.

    6. Update or Rollback Drivers

    • Open Device Manager → check drivers for yellow exclamation marks.
    • Update outdated drivers or rollback recent updates causing BSODs.

    7. Disable Automatic Restart

    • This lets you see the exact error code:
    1. Boot into Advanced Options → Startup Settings → Disable automatic restart.
    2. Note the stop code for further troubleshooting.

    8. Perform a System Restore

    • Restore Windows to a point before the error occurred:
    1. Advanced Options → Troubleshoot → System Restore
    2. Choose a restore point and follow prompts.

    9. Reset or Reinstall Windows

    • If all else fails:
    1. Advanced Options → Troubleshoot → Reset this PC
    2. Choose Keep my files (retains personal files) or Remove everything for a fresh install.

    Quick Fix Table

    StepActionPurpose
    1Restart PCFix minor glitches
    2Safe ModeTroubleshoot with minimal drivers
    3Uninstall updatesRemove conflicting updates
    4SFC & DISMRepair corrupted system files
    5Check DiskFix bad sectors & disk errors
    6Update/Rollback driversResolve driver conflicts
    7Disable automatic restartSee exact error code
    8System RestoreRevert to stable state
    9Reset/Reinstall WindowsFull fix if other methods fail

    Tips to Prevent This Error

    • Keep Windows up-to-date.
    • Regularly check and update drivers.
    • Scan for malware using a trusted antivirus.
    • Avoid installing unstable updates or third-party tweaks.
    • Backup important files regularly.

    FAQs

    Q1. Will this error delete my files?
    Not usually. Using Safe Mode or System Restore keeps files safe. Only a full reset will remove data if selected.

    Q2. Can faulty RAM cause this error?
    Yes, defective RAM is a common reason for BSOD errors. Consider running Windows Memory Diagnostic.

    Q3. How do I identify the exact cause?
    Disabling automatic restart reveals the stop code, which helps pinpoint the issue.

    Q4. Can malware trigger this error?
    Yes, malware can corrupt critical system files and cause a restart loop.

    Q5. Is a full reinstall necessary?
    Only if other fixes fail. Try Safe Mode, SFC, DISM, and System Restore first.


    Disclaimer

    This article provides general troubleshooting guidance. Individual results may vary. Always back up important files before performing system repairs.


  • How to Fix Automatic Repair Error & Blue Screen Error in Windows 10 & 11

    If your PC keeps booting into Automatic Repair or shows a Blue Screen of Death (BSOD), it can be frustrating. These errors indicate system instability or corrupted files. This guide explains why these errors occur and provides step-by-step solutions to fix them.


    What is Automatic Repair Error?

    Automatic Repair is a Windows feature designed to fix boot issues automatically.

    • If it fails, your PC may loop into the repair screen.
    • Common causes include corrupted system files, disk errors, or failed updates.

    Symptoms:

    • PC loops on “Automatic Repair” screen
    • Stuck at “Preparing Automatic Repair”
    • Cannot boot into Windows normally

    What is Blue Screen Error (BSOD)?

    A Blue Screen of Death (BSOD) occurs when Windows encounters a critical system error.

    • Causes include driver conflicts, hardware failure, or corrupted system files.
    • BSOD usually shows a stop code, e.g., CRITICAL_PROCESS_DIED or INACCESSIBLE_BOOT_DEVICE.

    Common Causes

    1. Corrupted Windows System Files
    2. Failing Hard Drive or SSD
    3. Driver Conflicts or Outdated Drivers
    4. Malware or Virus Infection
    5. Recent Windows Updates
    6. Memory (RAM) Issues

    Step-by-Step Solutions

    1. Restart Your PC

    Sometimes, a simple restart can break the repair loop.


    2. Boot Into Safe Mode

    Safe Mode loads Windows with minimal drivers.

    Steps:

    1. On the Automatic Repair screen → Advanced Options → Troubleshoot → Startup Settings → Restart.
    2. Press F4 for Safe Mode.
    3. Once in Safe Mode, you can uninstall problematic drivers or updates.

    3. Run Automatic Repair

    Windows has a built-in Automatic Repair tool:

    1. Advanced Options → Troubleshoot → Advanced Options → Startup Repair
    2. Follow on-screen instructions to repair boot files.

    4. Run System File Checker (SFC) & DISM

    Corrupted files often cause repair loops and BSODs.

    1. Boot into Safe Mode or Command Prompt from Advanced Options.
    2. Run the following commands:
    sfc /scannow
    DISM /Online /Cleanup-Image /RestoreHealth
    
    • SFC scans for corrupted system files.
    • DISM repairs Windows image.

    5. Check Disk for Errors

    Disk corruption can trigger both Automatic Repair and BSOD.

    1. Open Command Prompt → type:
    chkdsk /f /r C:
    
    1. Press Y to schedule a check on next restart.

    6. Uninstall Problematic Updates

    Sometimes Windows Updates cause boot issues:

    1. Advanced Options → Troubleshoot → Uninstall Updates
    2. Select Uninstall Latest Quality Update or Uninstall Latest Feature Update

    7. Update or Rollback Drivers

    Driver issues can cause BSODs:

    • Boot into Safe Mode → Device Manager → Update drivers
    • If a recent driver is causing issues, rollback to a previous version.

    8. Reset or Reinstall Windows

    If none of the above works:

    1. Advanced Options → Troubleshoot → Reset this PC
    2. Choose Keep my files (retains personal files) or Remove everything (fresh install)

    Quick Fix Table

    StepActionPurpose
    1Restart PCBreak simple repair loops
    2Boot Safe ModeTroubleshoot minimal drivers
    3Automatic RepairRepair boot files
    4SFC & DISMFix corrupted system files
    5Check DiskRepair disk errors
    6Uninstall UpdatesRemove problematic Windows updates
    7Update/Rollback DriversFix driver conflicts
    8Reset/Reinstall WindowsComplete fix if other steps fail

    FAQs

    Q1. Can I fix Automatic Repair error without losing data?
    Yes, using Safe Mode, SFC, DISM, or “Reset this PC → Keep my files” can preserve your data.

    Q2. Why does my PC keep looping into Automatic Repair?
    It usually happens due to corrupted system files, failing storage, or problematic updates.

    Q3. How do I know which driver caused a BSOD?
    BSOD stop codes and Event Viewer logs help identify faulty drivers.

    Q4. Can a virus cause Automatic Repair errors?
    Yes, malware can corrupt system files and trigger repair loops.

    Q5. Should I reinstall Windows if the error persists?
    If all other fixes fail, reinstalling Windows is the safest way to restore stability.


  • CPU Over Voltage Error – Causes, Solutions, and How to Fix It

    Seeing a CPU Over Voltage Error on your PC can be alarming, especially if your system suddenly shuts down or fails to boot. This error is a safety mechanism designed to protect your CPU from damage caused by excess voltage. In this guide, we’ll explain why it happens, what causes it, and how to fix it safely.


    What is CPU Over Voltage?

    CPU over voltage occurs when the voltage supplied to your processor exceeds safe limits. Modern CPUs are designed to operate within a specific voltage range. Exceeding this limit can lead to:

    • Overheating
    • System instability
    • Frequent crashes
    • Permanent CPU damage

    Symptoms of CPU Over Voltage Error:

    • PC fails to boot or restarts unexpectedly
    • Error message: “CPU Over Voltage Error” during startup
    • Blue Screen of Death (BSOD)
    • System instability during heavy tasks

    Common Causes of CPU Over Voltage Error

    1. Incorrect BIOS/UEFI Settings
      • Manual voltage adjustments or aggressive overclocking profiles.
    2. Faulty or Low-Quality PSU
      • Unstable power delivery can trigger motherboard protections.
    3. Overclocked CPU
      • Overclocking without proper voltage tuning often exceeds safe limits.
    4. BIOS Update or Corruption
      • A recent BIOS update may reset voltage values incorrectly.
    5. Defective Hardware
      • Faulty CPU or motherboard voltage regulators can also cause this error.

    How to Fix CPU Over Voltage Error

    1. Reset BIOS/UEFI to Default

    Resetting BIOS restores safe voltage settings.

    • Restart your PC and press DEL, F2, or F10 to enter BIOS.
    • Look for Load Optimized Defaults or Reset to Default Settings.
    • Save changes and restart your PC.

    This is often the quickest and safest fix.


    2. Check CPU Voltage Settings

    • Navigate to BIOS → CPU Voltage or Vcore settings.
    • Ensure voltage is within safe limits:
      • Intel CPUs: 1.0 – 1.35V
      • AMD CPUs: 1.0 – 1.45V
    • Avoid “Auto” settings if they cause over voltage.

    3. Disable Overclocking

    If your CPU is overclocked:

    • Disable all OC profiles in BIOS.
    • Test stability at stock settings.

    4. Update BIOS

    • Visit your motherboard manufacturer’s website.
    • Download the latest BIOS version and follow update instructions carefully.

    ⚠️ Improper BIOS updates can damage your motherboard, so proceed cautiously.


    5. Check Your PSU

    • Ensure your power supply is stable and sufficient for your CPU.
    • Use a high-quality PSU to prevent voltage spikes that trigger errors.

    6. Inspect Hardware

    • Check CPU seating and motherboard connections.
    • Look for damaged capacitors or burnt components.
    • Replace hardware if faults are found.

    Quick Fix Table

    StepActionPurpose
    1Reset BIOS to defaultRestore safe voltage levels
    2Check CPU voltageEnsure it’s within recommended range
    3Disable overclockingPrevent excess voltage
    4Update BIOSFix voltage regulation bugs
    5Check PSUEnsure stable power supply
    6Inspect hardwareRule out physical defects

    FAQs About CPU Over Voltage Error

    Q1. Can CPU Over Voltage permanently damage my CPU?
    Yes, sustained over voltage can shorten CPU lifespan or cause permanent damage.

    Q2. Is this error common after overclocking?
    Yes, overclocking increases voltage demand and often triggers this warning.

    Q3. Can resetting BIOS solve this issue?
    Yes, resetting BIOS to default usually fixes over voltage errors.

    Q4. What voltage is safe for Intel and AMD CPUs?

    • Intel: 1.0 – 1.35V
    • AMD: 1.0 – 1.45V

    Q5. Do I need to replace my CPU if I see this error?
    Not always. Most of the time, adjusting BIOS settings, PSU, or overclocking resolves the issue.


    Tips to Prevent CPU Over Voltage

    • Avoid aggressive overclocking without proper voltage tuning.
    • Use a high-quality PSU with stable output.
    • Monitor CPU voltage and temperature using software like HWMonitor, CPU-Z, or Core Temp.
    • Keep BIOS updated and reset to defaults after updates.